Showing posts with label interior design. Show all posts

Ditch Neutrals & Play with Unexpected Color

September 26, 2014


When I first started planning out the decor for our new apartment, I was set on a bright white and airy space with lots of neutrals and pop of color accents like Jen Ramos from MadebyGirl's Las Vegas home. I had trekked around Atlanta and narrowed the fabric for my couch down to three different beiges. Flash forward to the ADAC sample sale, and I was the proud owner of a new couch...a navy couch. Oops.

So, when one of my favorite sites for curated antique and decor hunting (you can buy and sell online with other design lovers!), Chairish, reached out to me to share what inspires my unique color combination, I was really excited to share what I learned.


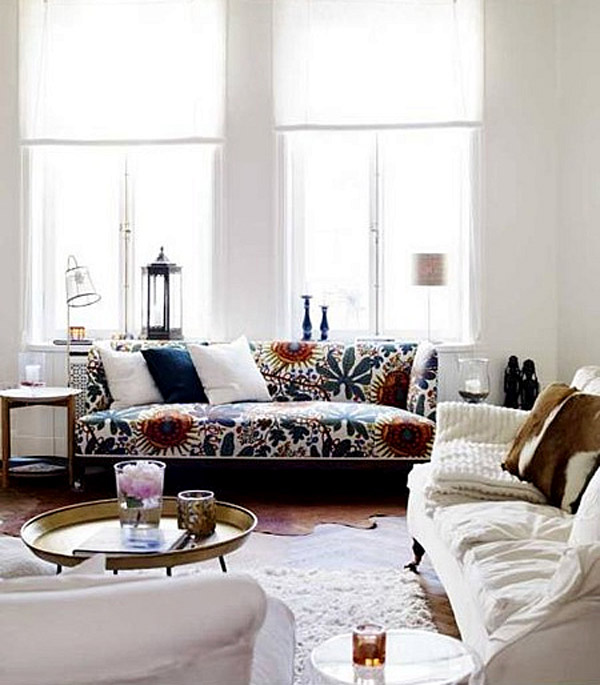
My inspiration for the room really came from the couch that challenged me to think about what colors would look great with navy and bring a calm and serene feel to my home. I did A LOT of playing around with different color combos like persimmon and pink to really find what I liked together. I paired the navy couch with a gray rug overlaid with a light cowhide to brighten the room but keep the relaxed feel I wanted.

Adding bold colors to your house can really be tough to not overpower or make the room look disjointed. I loved the color couple Chairish shared of Peacock and Dove, and had to take a stab at creating a room like this for myself. I am seriously thinking about adding some teal to our living room. Teal is a color I'm shocked I didn't explore initially, but one that I think really amps up the room to make it feel more glamorous.


What do you think?

Get The Look:

getting crafty / agate art

February 19, 2013

Agate has been catching my eye recently for it's mix of colors and crystal. At the top of my list, is definitely this custom agate wallpaper from Stanley Furniture that they are using in the showroom at the Las Vegas Design Center.


Isn't it impressive? I mean seriously, where can I get this STAT!

This agate patterned fireplace blew me away as well. Super chic yet down to earth. This is a style I think should definitely catch on - forget the painted brick fireplace.

Seacliff by Applegate Trans Interiors (Houzz)


So here's where the crafty part comes in.


Antique Picture Frame To Vanity Tray

December 18, 2012


This past weekend, I finally made a trip to the Brooklyn Flea Market. I've had a vanity tray on my room wish list for a while, and was able to find a antique wedding picture frame at the flea market that could do the trick. It's so easy to do I'm not even sure I can call it DIY, but it's the thought that counts, right? Most vanity trays have mirrors on the bottom, so I'm still deciding between a mirror base or patterned base.

For now, I've styled my new vanity tray with one of my favorite Leigh Viner's prints.


Here's some of my inspiration:

Bedroom Makeover - Boho Rug

December 05, 2012

My room is coming along although it looks absolutely nothing like my original plans. Turns out I gravitate towards boho items. I have finally purchased a new ikat, bohemian rug from Lulu & Georgia. I love the color it brings to my room, and it was affordable! I was a little worried because it's an indoor/outdoor rug made from woven straw and recyclable plastic, but it's actually perfect. And, I won't have to vacuum it a lot which is a huge plus!


I am still working on my bedding, curtains and artwork (don't judge me), but here's a full look at the rug.


And some more rugs I love for different rooms in your house:

Suzanis

November 08, 2012

As a result of my current Bohemian Chic obsession, I stumbled upon Justina Blakeney's blog, and it is fantastic!! She blogged about her trip to Istanbul last year, and her pictures from the Grand Bazaar are colorful and inspiring. 


photo credit - Justina Blakeney
In her posts she talks about "catching Suzani fever," in Istanbul, and I completely agree. I'm hooked. I love the bright colors, intricate details and geometric shapes of these vintage textiles and need one for my room.

photo credit - Justina Blakeney
So far my favorite Suzanis are the ones that mix navy and pink/coral. Here are a few I've found that I love.


source

source

As you can imagine finding handmade, vintage textiles that really look authentic are hard to find. From what I've seen, it looks like ebay is actually a better place than etsy (surprised? me too). The Loaded Trunk also has one that I really like (check out that pop of color), and I found a store in Charleston with one that I like as well.
source
source
Yes, I was only able to find two for sale right now that are the right size and color for my bed, which further supports my dream job. There is obviously a need for unique, worldly textiles for those of us in the states, and I am more to get out there and travel to get them for us.

Hump Day Home Makeover // Pattern Play with Josef Frank

October 03, 2012

This week's Hump Day Home Makeover will help you bring some pop to any room. This week I discovered Josef Frank. Yet another Austrian artist (Gustav Klimt being the first), whose work I love.

Who's Josef Frank? He was an Austrian architect, designer, painter, and founder of Swedish modernism, who produced over 200 patterns from 1909 to 1950. He was also a lover of botany, which I definitely think shows in his nature inspired, vine-like, modern designs. His patterns are fresh and different from a lot of patterns I've seen recently and work as the focal point to any room.

source -  fabric Aralia
source
source - fabric Teheran
source - wallpaper Paradiset
source - fabric Celon
source 
source
source 
source
So how can you get the look?

From what I've seen his textiles are pretty expensive, but luckily IKEA has picked up this Swedish modernism in many of their items...or you could splurge for the real thing. Here are some items I found, most of which are sold at Just Scandinavian:


Bold vine-like patterns are also popping up across the fashion world - as seen with Tibi's print - Belle.

source
Left -  Marie Anderson of Blame It On Fashion
Right - Hedvig Opshaug of The Northern Light. 
What do you think - Is a pop of pattern for your home, closet or both?

DIY Upholstered Tufted Headboard

September 28, 2012


I've finally completed my DIY tufted headboard project!! I owe a huge shout out to Jenny from Little Green Notebook for her DIY tufted headboard tutorial post. I couldn't have done it without the help!

As my first upholstery project, I had a lot of fun! But, it definitely wasn't easy (especially if you live in Manhattan). From trekking around the city with two sheets of pegboard, searching desperately for upholstery supplies (which are surprisingly nearly impossible to find), and carrying around a 4 ft long sheet of foam and large roll of batting - this project was dedication!

But I am really happy with my finished product.


Here's what I used:
  • 2 yards of fabric
  • Pegboard 
  • Upholstery Foam
  • Upholstery Thread
  • 5" upholstery needle
  • Batting
  • Spray Adhesive
  • 5/8" Button Making Kit and refills
  • Measuring Tape
  • Staple Gun + Staples
  • Scissors
  • Sharpie
**Few notes to anyone in Manhattan trying to complete this proj - I got 2 sheets of pegboard from Home Depot (on 23rd), and it was still not big enough for my full bed! I ended up using 2 pieces of wood that are meant for a door frame to make up the extra width (56") - Yes this was a pain! Hence my earlier note about dedication, but Home Depot doesn't cut wood in the city. For other supplies - I highly recommend Zarin Fabrics in LES for fabric, foam and batting. I got my button making kit around the corner from Lichtenstein & Co, and my upholstery thread and needle from PS Fabrics & Crafts in Chinatown. 


How-To:

To start, I had to decide what I wanted the headboard to look like. Searching online, the cheapest I found for the kind of headboard I wanted was a whopping $800. My final headboard cost me under $200! 

I started by attaching my 2 pieces of pegboard together. If you live in a city where The Home Depot will cut the pegboard for you, I'd suggest doing that. For a full bed, you need 56".


To do this, I used mending plates and cable ties to secure the boards together.


**Also ended up attaching two pieces of 3 1/2 inch wood to the sides to add extra length, but if you can get to a store to cut the exact size of pegboard for you - you can skip the attachment steps!

Next, I measured where I wanted the buttons to go. I ended up making mine 5 inches apart, and marked each spot with a circle and number so I'd know how many buttons to buy.


For button making, these button kits and refills are awesome, and super easy! Unfortunately my fabric was too thick to use this button size, so I ended up using the button making kit on a thinner fabric and then covering these with hand sewn buttons - instructions here (but hopefully you can avoid this!! It took me about an hour to do every 6 buttons).


And voila! The orange thread was used because this was all the regular thread I had, but it didn't matter because it won't show once you cut it down and attach it to the headboard.


Next, you want to take your board and foam and translate your measurements for the buttons from the pegboard to the foam. I measured out straight lines and then spots for the buttons to make sure they were in a straight line.


Then, you use your spray adhesive to attach the foam to the pegboard. Once the two pieces are attached and dried, use a knife to cut holes in the foam corresponding with your button markers. This will allow for your deeper tufts, and it's fun!


And cover your headboard with batting and staple the edges to the back of the pegboard.


Later in this process when I was tufting, I found it was easier to staple the fabric back with one layer of batting in between the fabric and the board, and that my staples were too short to go through the fabric and doubled up layers of batting. Just something to keep in mind - you might want to trim your batting at this step so it's not too thick depending on your staple size.


After the batting was secured, I started tufting - starting at the top and in the middle. To do this, you take doubled up upholstery thread, triple knot it around your button loop and feel out the board for your first hole. You then stick the needle through the fabric, batting, foam and pegboard hole and pull tightly. I recommend pushing on the button from the front of the board for a deep tuft. Using your staple gun, you secure the thread with staples pulling the thread at angles and stapling to ensure a tight hold.


Continue with this process of starting in the middle and moving to the edges as you work through each tuft of the board. While I was tufting, I also worked with the fabric to make sure the uniform creases were at the top of the board, and that the diagonal creases were standard from top to bottom.


Once you've finished all tufts, lay your board on the ground to secure the fabric on the underside of the foam with staples. My foam was 56" by 24", so you'll see it didn't cover all of my pegboard. I left some extra fabric below the foam to make sure the pegboard wasn't visible behind my bed.


I'm still working on my overall look for my room, but the headboard is a great start!
Proudly designed by Mlekoshi playground