Showing posts with label diy decor. Show all posts
Antique Picture Frame To Vanity Tray
December 18, 2012
This past weekend, I finally made a trip to the Brooklyn Flea Market. I've had a vanity tray on my room wish list for a while, and was able to find a antique wedding picture frame at the flea market that could do the trick. It's so easy to do I'm not even sure I can call it DIY, but it's the thought that counts, right? Most vanity trays have mirrors on the bottom, so I'm still deciding between a mirror base or patterned base.
For now, I've styled my new vanity tray with one of my favorite Leigh Viner's prints.
Here's some of my inspiration:
Hump Day Home Makeover - DIY Rug
October 10, 2012
I've had quite a few friends reach out to me recently for rug advice, so I thought this would be a great topic for this week's hump day home makeover.
One of the things that I think makes buying a new rug so hard is the cost. If you're just looking for a cute rug to cover your apartment floor for a year or two it's hard to justify the $1,000+. So since I'm on a 'I could make that for less' kick, this week I wanted to share some awesome DIY rug projects from a few bloggers who have merged two of my current favorite trends in design - DIY for less and IKEA hacks!
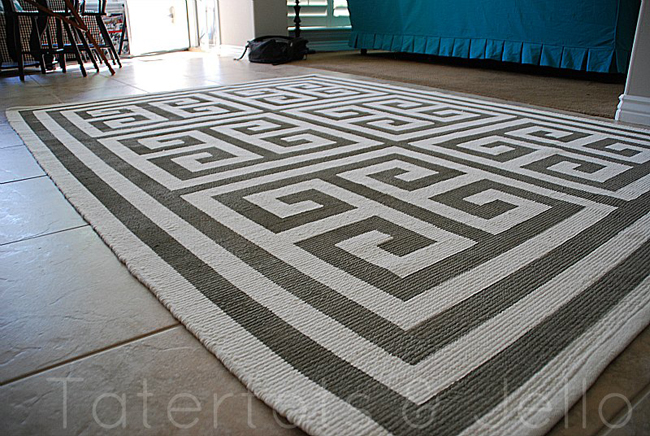
This Greek key rug is my favorite (and most likely my weekend project). I have been dying for a Greek key rug and much like Jen from Tatertots & Jello have only been able to find them out of my price range. Jen managed to pull off the rug below for only $80!!
![]() |
| DIY Greek Key Rug - Tatertots & Jello |
This rug is from Design Sponge, and only cost $60!![]() |
| DIY painted geometric rug - Design Sponge |
| This rug was under $100. |
| project and photo credit - Mason Jar Champagne |
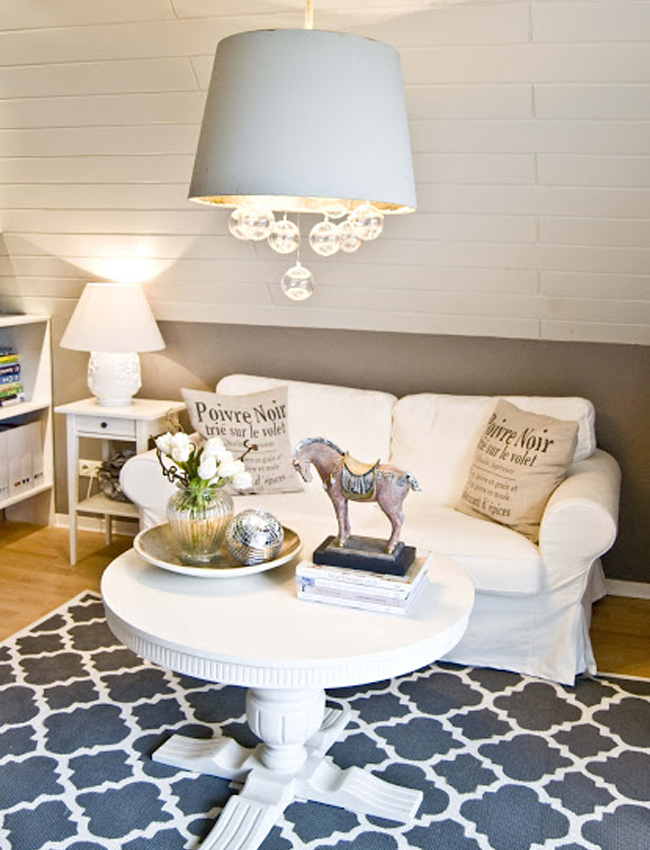
This rug is probably my second favorite (but I'm sure that has something to do with the room's decorating!)
![]() |
| DIY geometric rug - Pudel-Design |
Labels:
chevron rug,
diy decor,
diy decorating,
diy ideas,
diy rug,
greek key rug,
makeover,
rug,
under $100
DIY Filing Cabinet Makeover
December 03, 2011
Remember when getting mail used to be fun? Now the only mail I get are bills or statements and I need somewhere to put them. I've been using an arrangement of cardboard filing boxes, but I think it's about time for an upgrade. But what am I supposed to with this? This does not go with my decor.
I found this awesome DIY on Design Sponge for how to makeover a filing cabinet, and wanted to give it a try. I went to Binders and picked out a patterned paper that is right up my alley. I love mixing white and gold together and I thought this print was fun but still classic and elegant. The neutral of the cabinet will make it easy to coordinate with my office decor.
Materials
Filing Cabinet
Screwdriver
High Gloss Latex Paint
Brush (I used a rolling and foam brush)
Patterned paper or wallpaper
Mod Podge (I used Modge Podge Gloss All-in-One Decoupage Sealer / Glue / Finish)
Exacto Knife
Spray Paint or new hardware
Paint Tray
Paint Tray
Here's where you start - with your standard gray filing cabinet. I mean seriously could
you make this things any less appealing? Pour some of the paint into your paint tray so the bottom is covered. Use your rolling brush, and start painting the gray cabinet. Follow the paint instructions to allow it to fully dry before applying a second coat. Since my cabinet was so dark and I painted it white, it took me about 6 or 7 coats. Also, make sure to paint the front of the drawers if your cabinet is dark, and your paper is light so the color does not show through.
Use a foam brush to evenly
spread the Mod Podge to the front of the drawers, and carefully lay your paper
on top. Use a plastic edge to smooth out the air bubbles and allow drying. Once dry, use the exacto knife to remove the excess paper. Apply a layer of Mod Podge on top of the paper and allow to
dry. Air bubbles will reappear
during this step, but you do not need to try and smooth them out. Once it dries they
will disappear. Spray a layer of polycrylic over the entire
cabinet to seal and protect. If using new handles, use your screwdriver to
apply them.
If you are redoing the original handles, spray paint them with the desired color and allow to dry. This may take a few coats as well if original file cabinet color is dark.
Doesn't this look so much better?
Subscribe to:
Posts (Atom)