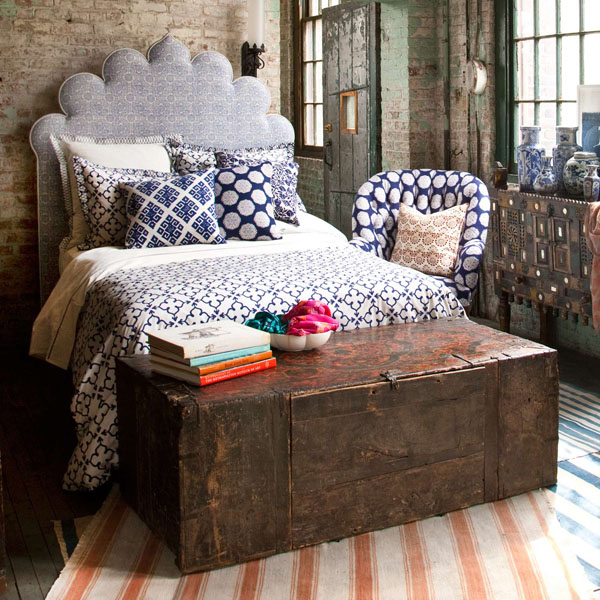
DIY Upholstered Tufted Headboard

September 28, 2012


I've finally completed my DIY tufted headboard project!! I owe a huge shout out to Jenny from Little Green Notebook for her DIY tufted headboard tutorial post. I couldn't have done it without the help!

As my first upholstery project, I had a lot of fun! But, it definitely wasn't easy (especially if you live in Manhattan). From trekking around the city with two sheets of pegboard, searching desperately for upholstery supplies (which are surprisingly nearly impossible to find), and carrying around a 4 ft long sheet of foam and large roll of batting - this project was dedication!

But I am really happy with my finished product.


Here's what I used:
  • 2 yards of fabric
  • Pegboard 
  • Upholstery Foam
  • Upholstery Thread
  • 5" upholstery needle
  • Batting
  • Spray Adhesive
  • 5/8" Button Making Kit and refills
  • Measuring Tape
  • Staple Gun + Staples
  • Scissors
  • Sharpie
**Few notes to anyone in Manhattan trying to complete this proj - I got 2 sheets of pegboard from Home Depot (on 23rd), and it was still not big enough for my full bed! I ended up using 2 pieces of wood that are meant for a door frame to make up the extra width (56") - Yes this was a pain! Hence my earlier note about dedication, but Home Depot doesn't cut wood in the city. For other supplies - I highly recommend Zarin Fabrics in LES for fabric, foam and batting. I got my button making kit around the corner from Lichtenstein & Co, and my upholstery thread and needle from PS Fabrics & Crafts in Chinatown. 


How-To:

To start, I had to decide what I wanted the headboard to look like. Searching online, the cheapest I found for the kind of headboard I wanted was a whopping $800. My final headboard cost me under $200! 

I started by attaching my 2 pieces of pegboard together. If you live in a city where The Home Depot will cut the pegboard for you, I'd suggest doing that. For a full bed, you need 56".


To do this, I used mending plates and cable ties to secure the boards together.


**Also ended up attaching two pieces of 3 1/2 inch wood to the sides to add extra length, but if you can get to a store to cut the exact size of pegboard for you - you can skip the attachment steps!

Next, I measured where I wanted the buttons to go. I ended up making mine 5 inches apart, and marked each spot with a circle and number so I'd know how many buttons to buy.


For button making, these button kits and refills are awesome, and super easy! Unfortunately my fabric was too thick to use this button size, so I ended up using the button making kit on a thinner fabric and then covering these with hand sewn buttons - instructions here (but hopefully you can avoid this!! It took me about an hour to do every 6 buttons).


And voila! The orange thread was used because this was all the regular thread I had, but it didn't matter because it won't show once you cut it down and attach it to the headboard.


Next, you want to take your board and foam and translate your measurements for the buttons from the pegboard to the foam. I measured out straight lines and then spots for the buttons to make sure they were in a straight line.


Then, you use your spray adhesive to attach the foam to the pegboard. Once the two pieces are attached and dried, use a knife to cut holes in the foam corresponding with your button markers. This will allow for your deeper tufts, and it's fun!


And cover your headboard with batting and staple the edges to the back of the pegboard.


Later in this process when I was tufting, I found it was easier to staple the fabric back with one layer of batting in between the fabric and the board, and that my staples were too short to go through the fabric and doubled up layers of batting. Just something to keep in mind - you might want to trim your batting at this step so it's not too thick depending on your staple size.


After the batting was secured, I started tufting - starting at the top and in the middle. To do this, you take doubled up upholstery thread, triple knot it around your button loop and feel out the board for your first hole. You then stick the needle through the fabric, batting, foam and pegboard hole and pull tightly. I recommend pushing on the button from the front of the board for a deep tuft. Using your staple gun, you secure the thread with staples pulling the thread at angles and stapling to ensure a tight hold.


Continue with this process of starting in the middle and moving to the edges as you work through each tuft of the board. While I was tufting, I also worked with the fabric to make sure the uniform creases were at the top of the board, and that the diagonal creases were standard from top to bottom.


Once you've finished all tufts, lay your board on the ground to secure the fabric on the underside of the foam with staples. My foam was 56" by 24", so you'll see it didn't cover all of my pegboard. I left some extra fabric below the foam to make sure the pegboard wasn't visible behind my bed.


I'm still working on my overall look for my room, but the headboard is a great start!

Make Up Bag Refresh!

September 25, 2012


I'm the classic offender of holding on to make up for far too long. So with Fall here, I'm doing a make up bag cleanse and refreshing with new looks for the season.

Make Up Bag Cleanse 101:
  1. Most sites say you can keep make up products for about 18 months, but I think it's best to live by the policy of - if you can't remember when you bought it - toss it
  2. Wash your brushes! It's suggested that this is done every 2-3 weeks. I think every month is fine. I love Bobbi Browns' Conditioning Brush Cleanser.
  3. Refresh your mascara every 3 months - This one is a must because let's be serious, eye infections are not cool. 
  4. Don't forget to clean your bag too.
  5. Replenish!
Here's a look for daytime and night time that I am loving for Fall from Bobbi Brown and Refinery29.

 What you need to get the look:


 What you need to get the look:

John Robshaw - Asian Influenced Textiles

September 24, 2012

The other week I checked out John Robshaw's trunk show at the Bloomingdales at 59th and Lex. His company offers a variety of bedding collections, pillows, clothing, table cloths, curtains and more. His textile designs are heavily influenced by his Asia travels, and are a great mix of color and pattern.

They are handmade by artisans in various workshops in India. I also love that John is a consultant for Aid for Artisans, a nonprofit organization dedicated to creating economic opportunities for craftspeople in developing nations. Plus this makes me feel a lot better about some of his hefty prices.

Here are a few of my favorites:

Tula bedding

Pipal bedding
Afghan pillows

Bungalow pillows

Verdin pillows
Cliff Quilt

 This vintage throw is by far my favorite, but doesn't look like it's available online anymore.


Trend Spot - week of 9.18

September 18, 2012

I am obsessed with everything in Shea Marie's outfit from Cheyenne Meets Chanel. Love the high and low lights in her hair and her entire outfit, but mostly the Joie Lexandra Jacket.

source

But like every outfit I LOVE, the look costs more than my NYC apartment rent. So, I put together the look for less, which I will most likely be sporting on the next UGA game day.

 
1 | 2 | 3 | 4 |

More items I'm loving for Fall - red leather jackets & knit sweaters!

Target $35
Express - $118


ASOS - $275

Neiman Marcus - $398

Zara $59.90

Zara $59.90

Free People $98

Anyone else over weekend snapshots?

September 17, 2012

Good me too.

This weekend I went home for the annual Bike MS Atlanta Ride to support multiple sclerosis research and Team Drummond. We had 66 registered riders and have raised over $34K so far!

It was an amazing weekend as always.
Two hours and 30 minutes on the bike was well worth the cause.
And guess what! 
You can still donate to support the Multiple Sclerosis here

The rest of my weekend was very busy trying to cram in eating at all of my favorite Mexican restaurants (twice) along with friends, family and bf quality time.

Somehow, I still managed to sneak in a trip to a design store and complete a dresser redo. 

So to those of you in Atlanta...
you should check out Horizon Home on Ellsworth Boulevard.

 French influenced floor-ceiling mirror 


 art deco desk? vanity? chest of drawers? I think vanity - see inspiration
 I thought this was really cool and very unique! Maybe best at a beach house, but I could see this as a stand up bar with you tray of liquor and glasses up top and bottom and wine bottles in the middle.
  I loved this piece that mixed the natural wood and metal - very Restoration Hardware, but much cheaper.
If I owned a restaurant on the Westside of Atlanta, I would have bought this piece to do something cool with it around the hostess area.

Final dresser redo pics coming soon, but in the meantime...
here's a sneak peak and a cute puppy!


C
Proudly designed by Mlekoshi playground